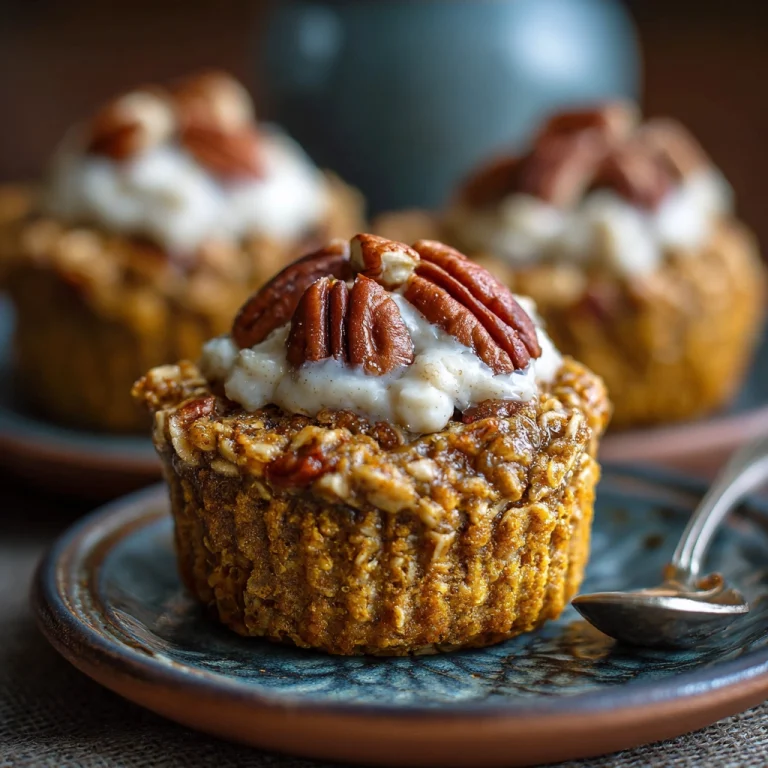
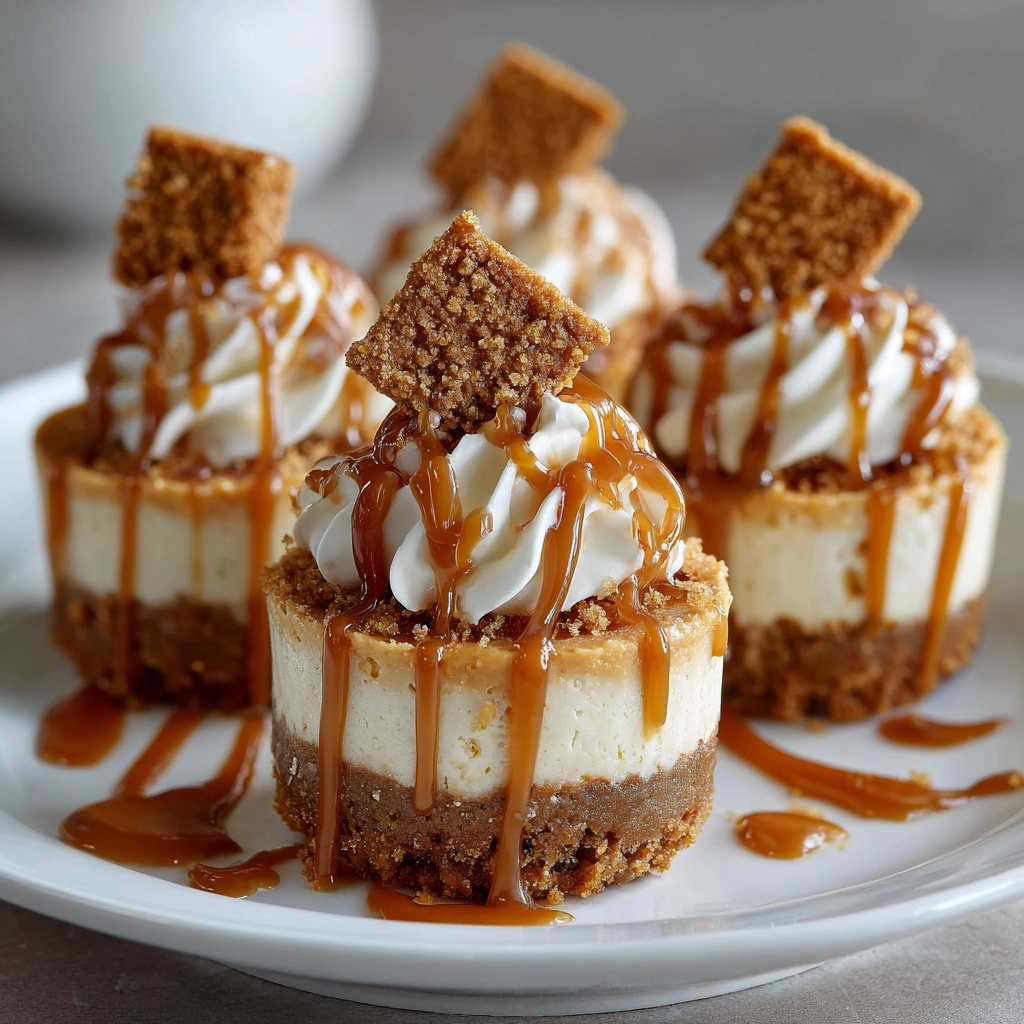
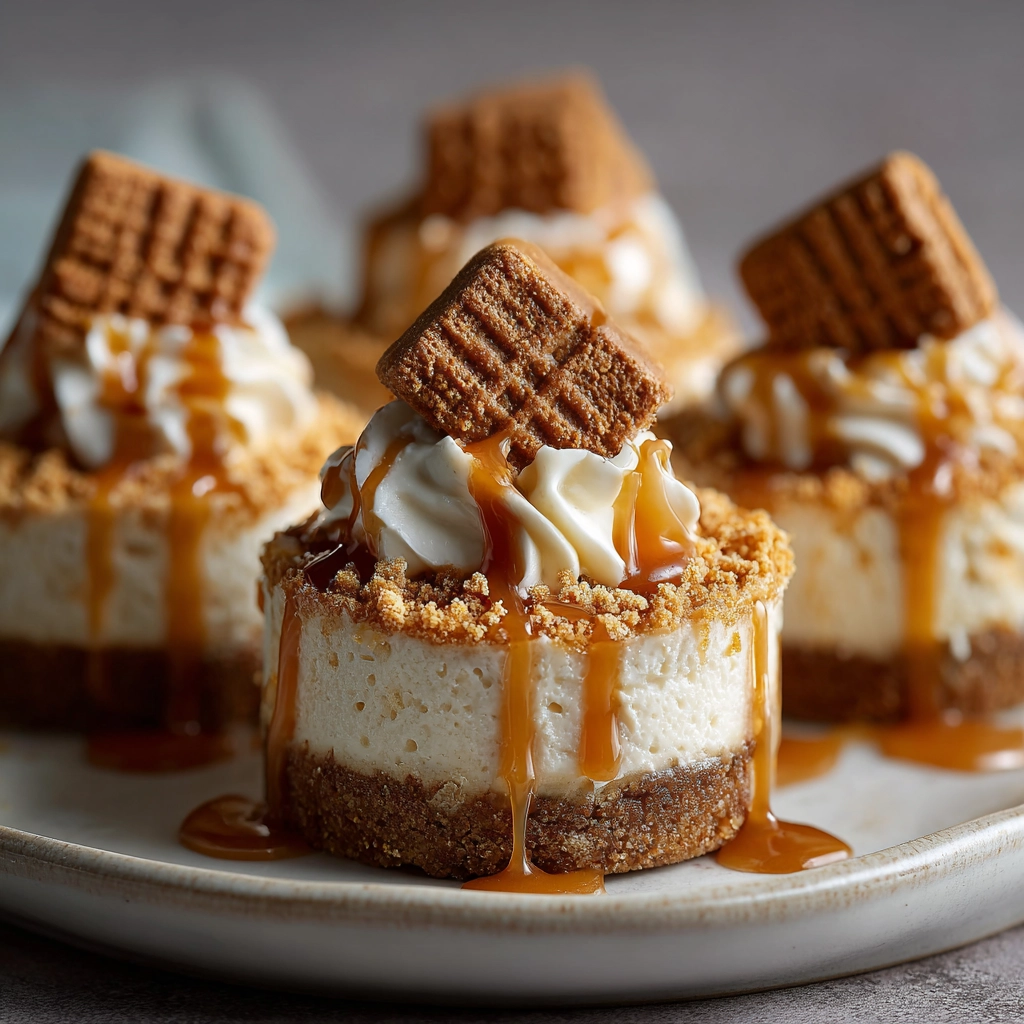
Mini Biscoff Cheesecakes Recipe – Easy, Creamy, No-Bake Dessert
Silky, rich, and irresistibly spiced, Mini Biscoff Cheesecakes Recipe bring together the comforting warmth of caramelized biscuits with the creamy indulgence of classic cheesecake. Each bite melts smoothly on the tongue, delivering a perfect balance of sweetness and subtle spice that makes this dessert truly unforgettable. The magic lies in the iconic flavor of Biscoff, known for its deep caramel notes and slightly crunchy texture when used as a base.
Perfectly portioned and visually charming, these mini cheesecakes are ideal for parties, celebrations, or even as a quick treat to satisfy a sweet craving. Their individual size makes them easy to serve and even easier to enjoy without the need for slicing or plating. Whether you’re hosting guests or simply experimenting in your kitchen, this recipe offers a delightful twist on traditional cheesecake that feels both modern and comforting.
Ingredients Needed
| Ingredient | Quantity | Calories (Approx.) |
|---|---|---|
| Biscoff biscuits | 200 g | 960 kcal |
| Unsalted butter (melted) | 100 g | 717 kcal |
| Cream cheese | 400 g | 1360 kcal |
| Biscoff spread | 200 g | 1180 kcal |
| Powdered sugar | ¾ cup | 300 kcal |
| Heavy cream | 1 cup | 800 kcal |
| Vanilla extract | 1 tsp | 12 kcal |
| Eggs | 2 large | 140 kcal |
| Lemon juice | 1 tbsp | 4 kcal |
Step-by-Step Cooking Instructions
1: Prepare the crust
Crush the Biscoff biscuits into fine crumbs. Mix them with melted butter until the texture resembles wet sand. Press the mixture firmly into the base of muffin liners placed in a tray.
2: Pre-bake the base (optional)
Bake the crust at 180°C (350°F) for 8–10 minutes for a firmer base. Allow it to cool completely.
3: Make the filling
In a large bowl, beat cream cheese until smooth. Add powdered sugar and vanilla extract, mixing until creamy.
4: Add Biscoff flavor
Blend in the Biscoff spread and mix until fully incorporated.
5: Incorporate eggs and cream
Add eggs one at a time, mixing gently. Pour in heavy cream and lemon juice, stirring until smooth and lump-free.
6: Fill and bake
Pour the cheesecake mixture over the crusts, filling each liner about ¾ full. Bake at 160°C (320°F) for 18–22 minutes until the centers are slightly set.
7: Cool and chill
Let the cheesecakes cool at room temperature, then refrigerate for at least 4 hours or overnight.
8: Decorate
Top with melted Biscoff spread or crushed biscuits before serving.
Tips for Customizing the Recipe
- No-bake version: Skip the eggs and baking. Use whipped cream to stabilize the filling and chill until firm.
- Extra indulgence: Add a layer of melted chocolate between the crust and filling.
- Fruit twist: Top with sliced bananas or strawberries for added freshness.
- Crunchy topping: Sprinkle crushed nuts or extra biscuit crumbs on top.
- Lighter option: Use low-fat cream cheese to reduce calories without compromising too much on flavor.
Nutritional Information
Approximate values per mini cheesecake (based on 10 servings):
| Nutrient | Amount |
|---|---|
| Calories | 350–420 kcal |
| Carbohydrates | 30–38 g |
| Fat | 22–28 g |
| Protein | 5–7 g |
| Sugar | 20–26 g |
Serving Suggestions
Serve Mini Biscoff Cheesecakes chilled for the best texture and flavor. Present them on a decorative dessert tray or in cupcake liners for a neat and appealing look. Pair them with a hot cup of coffee or cappuccino to enhance the caramel notes of the Biscoff. For special occasions, drizzle extra Biscoff spread on top or add a dollop of whipped cream for a bakery-style finish.

Mini Biscoff Cheesecakes
10 mini cheesecakes
servings20
minutes20
minutes350-420
kcalIngredients
200 g Biscoff biscuits
100 g unsalted butter (melted)
400 g cream cheese
200 g Biscoff spread
¾ cup powdered sugar
1 cup heavy cream
1 tsp vanilla extract
2 large eggs
1 tbsp lemon juice
Extra Biscoff spread or crushed biscuits for topping
Directions
- Prepare crust: Crush Biscoff biscuits and mix with melted butter. Press into muffin liners.
- Optional pre-bake: Bake crust at 180°C (350°F) for 8–10 minutes. Cool completely.
- Make filling: Beat cream cheese until smooth. Add powdered sugar and vanilla extract.
- Add Biscoff spread: Blend in spread until fully incorporated.
- Add eggs & cream: Mix in eggs one at a time, then stir in heavy cream and lemon juice.
- Fill cups: Pour mixture into liners about ¾ full.
- Bake: Bake at 160°C (320°F) for 18–22 minutes until centers are set.
- Cool & chill: Cool to room temperature, then refrigerate for 4+ hours.
- Decorate: Top with melted Biscoff spread or crushed biscuits. Serve chilled.
Recipe Video
Notes
- High-quality Biscoff spread gives the richest flavor—don’t substitute lightly.
Silicone muffin cups make it easy to remove mini cheesecakes without breaking them.
Do not overbake—centers should be slightly set; they will firm up as they cool.
FAQs
1. Can I make Mini Biscoff Cheesecakes without baking?
Yes! You can make a no-bake version by skipping the eggs and using whipped cream or gelatin to stabilize the filling. Chill until firm.
2. How long should I chill the cheesecakes before serving?
For the best texture and flavor, refrigerate for at least 4 hours. Overnight chilling is ideal.
3. Can I use regular biscuits instead of Biscoff?
Yes, graham crackers or digestive biscuits can work, but the signature caramel-spiced flavor of Biscoff will be missing.
4. How long do Mini Biscoff Cheesecakes last in the fridge?
Store in an airtight container; they remain fresh for up to 3–4 days.
5. Can I freeze these cheesecakes?
Yes, freeze individually or in a tray for up to 1 month. Thaw in the fridge before serving to maintain texture.
Conclusion
Mini Biscoff Cheesecakes combine elegance, convenience, and indulgence into one irresistible dessert. Their rich, creamy filling paired with the signature caramelized biscuit base creates a flavor that feels both luxurious and comforting. Easy to prepare and even easier to serve, these bite-sized treats are perfect for any occasion. Once you try them, they’re bound to become a favorite in your dessert collection—simple, stunning, and absolutely delicious.